|
|
| HOME | GRAVEYARD | CAULDRON | FUNERAL PARLOR | MAUSOLEUM | DUNGEON | PROPS | PARTIES |
| AWARDS | GUEST BOOK | LINKS | WEB RINGS | GAMES |
![]()
![]()
Created in 2004....
I used the instructions at http://hometown.aol.com/smessin983/Halloween/Columns.html as the bases of my columns but I did a few things differently. Also, I didn't try to make a perfectly constructed post, it is just a prop after all....Changes in Materials from original instructions:
I needed three - 8' lengths of 2x4 lumber to make the column frame. My sides are 12 inches on each side.
One 2x8 3/4"sheet of pink insulating foam (cost $7).The Bricks
I looked everywhere for the stick on 3D bricks wall panels but no one carries them anymore. So, I decided to make bricks from the foam and glue them onto the plywood using Liquid Nails to give the 3D appearance. I made two sizes of bricks, 7" and 4 1/2". It took 104 bricks for each column. Half a sheet of the foam resulted in 76 3/4" bricks which I then cut in half using a mini hacksaw to give more of a brick surface appearance (plus 3/4" bricks were too thick). Rub the two side together in a circular motion to remove loose bits of foam before painting. The texture really looks real! Like the instructions, I tried to match the columns to my house (antique brick in background). They don't...don't try. I spray painted all the bricks a deep wine red. I then sprayed some with gray, black or terra cotta colored paint for the antique brick appearance.Other Changes from published instructions:
I primed my built columns with gray. I attached the top piece of plywood last (they were easier to pick up and move without the top on). I painted the mortar lines directly on the plywood sides using special sand-like spray paint. I cut a guide out of cardboard to prevent overspray. I was concerned the bricks would not adhere to a textured surface. (Note regarding textured spray paints: doesn't work well unless spray can is vertical. Expensive lessons since each can cost $8 and I used 3 for the mortar. Probably could have gotten away with just 2.) The top and bottom frames and top piece I painted with a gray stone-textured spray paint to give a concrete/stone like appearance. I sprayed a clear matte finish sealant on the entire thing to protect from the elements.After seeing the finished product, I should have used at least 8 more bricks per column. The spacing between the brick rows is too wide. But overall I'm very pleased with how they turned out. It was a lot of work however, much harder than making the fence and even though I tried to use light-weight materials, they are still heavy. I think for Christmas this year I'll ask for a storage shed to store them in.
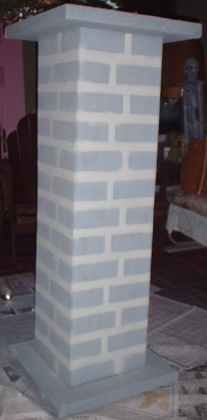 Primed Column with Mortar Lines |
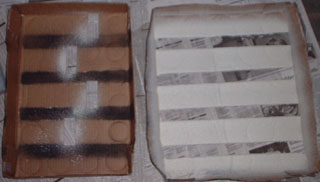 Mortar Pattern Guides
|
 Sawing the 3/4" thick brick in half using Stanley Mini Hacksaw |
 Showing the brick-like texture created. |
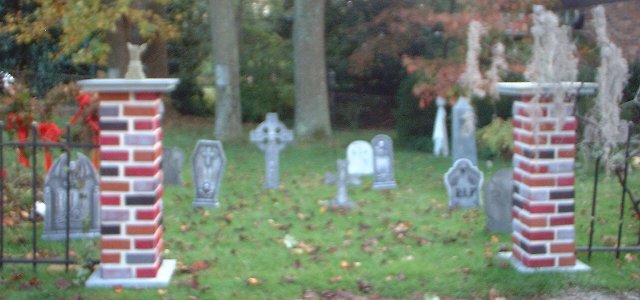 The new entrance to the graveyard |
|
![]()
|
|
|
|
![]()
![]()